Windows 10 - Virtualization
One of the features that Windows 10 has included is the capacity of creating virtual machines. A virtual machine is the software emulation of a computer system. They are created within a real or physical computer, allowing you to create multiple separate “computers” that can run different operating systems and programs. These virtual machines are handled using a special software called a Hypervisor. In this case, Microsoft’s own Hyper-V.
Due to the advanced nature of virtualization, not all computers can run virtual machines. In the past, this feature was reserved for servers. But with operating systems like Windows 10, users can create their own virtual machines too.
Pre-requisites in Windows 10
The basic pre-requisites for creating and running virtual machines in Windows 10 are the following −
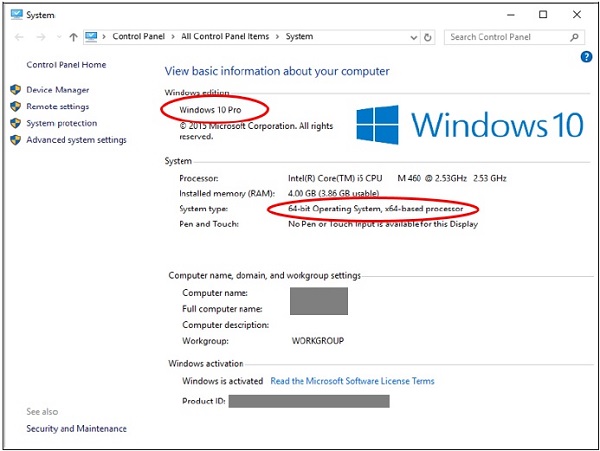
- A 64-bit edition of Windows 10 Pro or Windows Enterprise. Hyper-V isn’t available for Windows 10 Home edition.
- Your computer processor needs to support virtualization, or more specifically SLAT (Secondary Level Address Translation).
- Virtualization has to be enabled in your computer’s BIOS. This is a small program that handles the boot-up of your computer making sure everything is in the right place.
What Windows version do you have?
To find out what specific Windows version you have, follow these steps −
Step 1 − Open the Control Panel by searching for it in the Search bar.
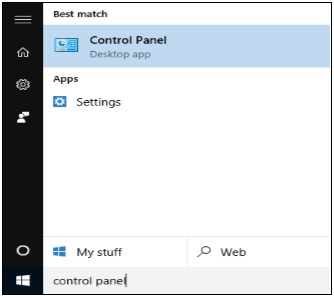
Step 2 − After the Control Panel is open, choose System.
Step 3 − In the System window you can see what specific Windows version and what type of processor (CPU) your computer has.
Enabling Virtualization in the BIOS
The BIOS is a small program that runs whenever you turn on your computer. Its basic function is to help the computer boot up by making sure everything is working properly. However, it also controls some advanced features within your computer, some of which have to be enabled in order to work. One example is Virtualization.
To enable virtualization, follow these steps −
Step 1 − Restart your computer and enter the BIOS setup. This is done by pressing a key just as the computer is turned on. The key you have to press varies from one system to another, but it usually is F2, F10, or Delete. Most systems tell you which key to press to enter the setup, or you can consult your computer manual.
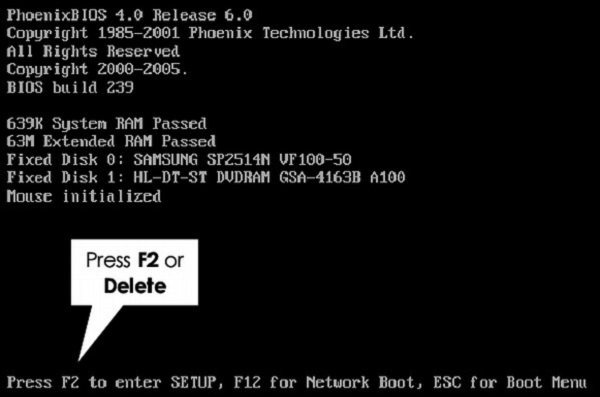
Step 2 − After entering the BIOS setup, you must enable all virtualization settings. The BIOS also varies greatly from system to system, depending on the brand.
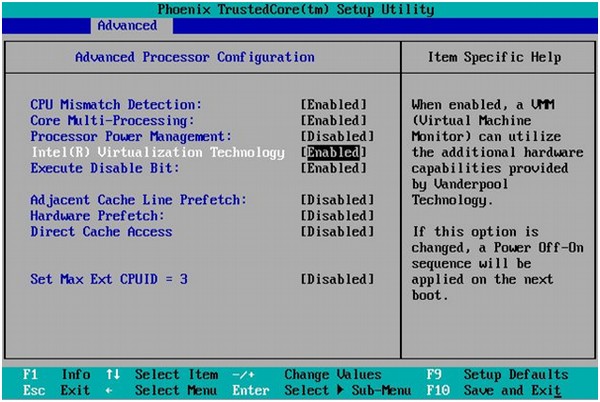
Step 3 − After enabling all necessary settings, save and exit the BIOS setup. This is usually done by pressing F10. After this, the computer will restart.
Setting Up Hyper-V
To create and manage virtual machines, you need to set up Microsoft Hyper-V. To do this, follow these steps −
Step 1 − Open the Control Panel by searching for it in the Search bar.

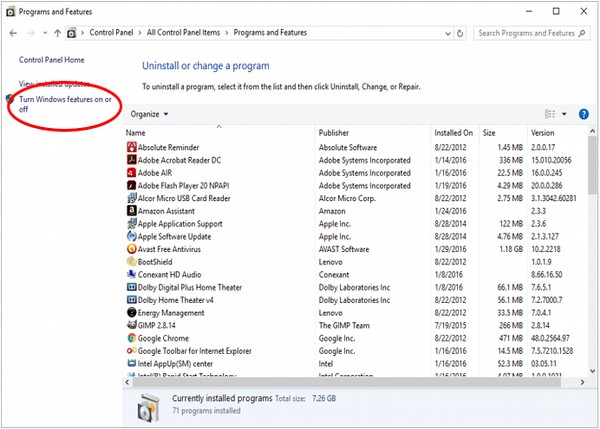
Step 2 − After the Control Panel is open, choose Programs and Features.
Step 3 − In the Programs and Features window, click “Turn Windows features on or off”.
Step 4 − In the Windows Features window, look for the Hyper-V feature and check all the boxes.
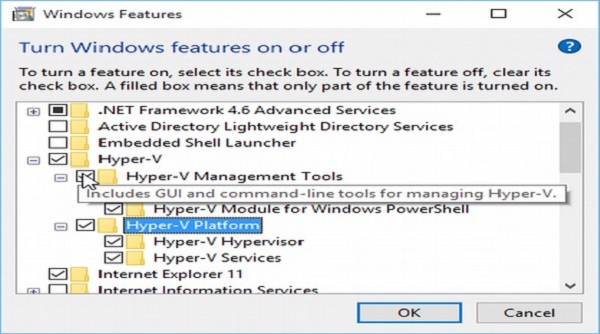
Windows will then install and configure Hyper-V, after which it will ask you to restart and confirm the changes. It will then go through a series of restarts to finish configuring your system.

Using Hyper-V to Create a Virtual Machine
After Hyper-V finishes installing, you can open it and use it to create virtual machines in your Windows 10 computer. To start Hyper-V and create a virtual machine, follow these steps −
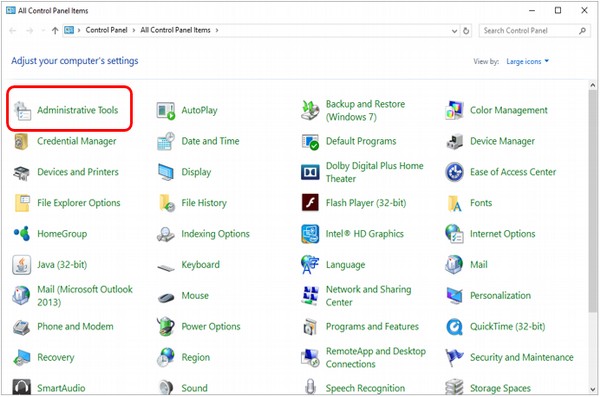
Step 1 − Enter Control Panel and select Administrative Tools.
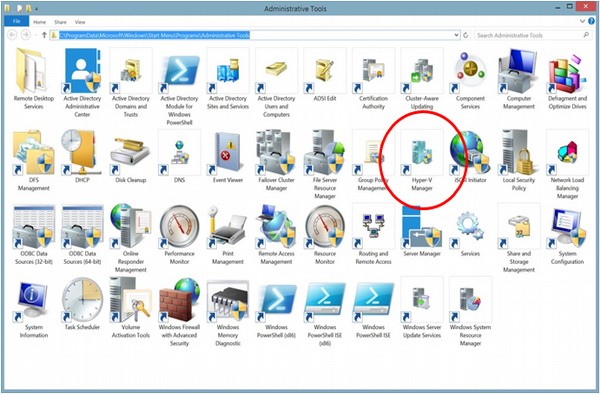
Step 2 − In the Administrative Tools window, click on Hyper-V Manager.
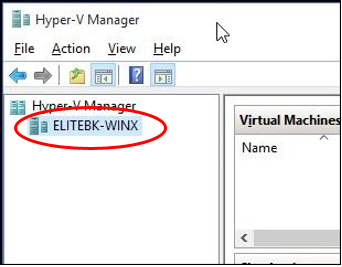
Step 3 − When Hyper-V starts, you will see the name of your computer on the left-side of the application. Select the computer to work on it.
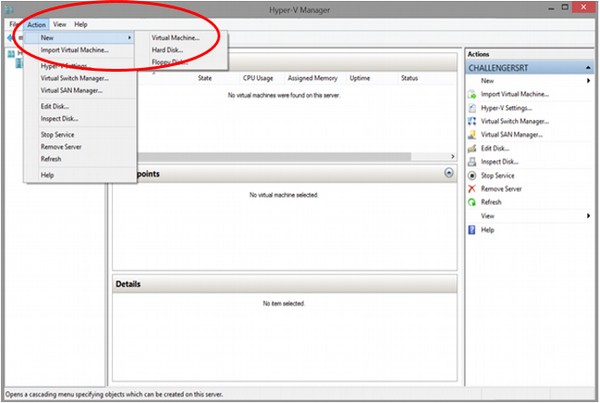
Step 4 − On the Action menu, select New and Virtual Machine.
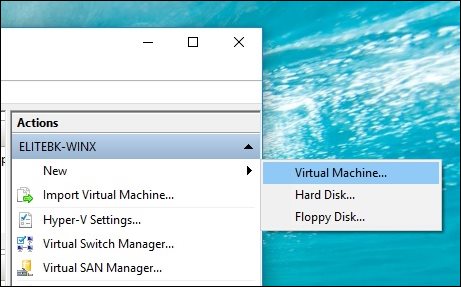
You can also do this from the sidebar on the right-side of the application, under Actions.
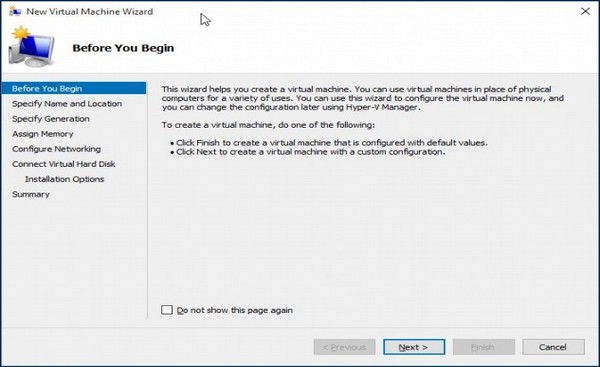
Step 5 − Hyper-V will open the New Virtual Machine Wizard to help you in the process of creating a virtual machine. Here you can click the Finish button to create a virtual machine with some basic configurations. Advanced users can click Next to go through the steps of creating a customized virtual machine.
Step 6 − After the virtual machine is created, you will see it inside the Hyper-V window.
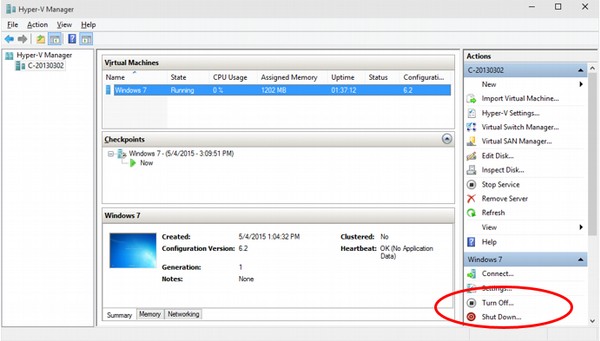
Like real, physical computers, virtual machines need to have an operating system installed in order to work. Hyper-V allows you to turn them on or shut them down using the buttons on the right side.